MyQuickCloud
  • Product
    • Features
    • How it works
  • Solutions
    • QuickBooks
    • Bring your own device
    • Work across multiple locations
    • Your business IT network
  • Pricing
  • Support
    • Support Center
    • Downloads
    • Contact us
Login Get started

Support

Popular Search how toquickbookslogin issuesuserupdate

Technical

14
  • Issues connecting to MyQuickCloud following an upgrade to Windows 11
  • Date Format and Currency Settings Are Incorrect
  • Cloud Server Security
  • Vedivi Service Level Agreement for Cloud Servers
  • MyQuickCloud Installer on Mac Is Damaged or Can’t Be Opened
  • Networked Drives in MyQuickCloud
  • Computer is Offline
  • Self Hosting Security Guide
  • Add MyQuickCloud to Your Firewall Rules
  • Common Windows Folder and File Permissions
  • User Profile Cannot Be Loaded Error
  • Your Application Is Frozen or Wont Start
  • The Application You Want to Publish Is Not Listed
  • Network Level Authentication Is Turned On

How To

25
  • How To – Give access to users to your server
  • How To – Add, Remove and Manage Users
  • How to update your payment method
  • How to update your subscription
  • How to Cancel Your MyQuickCloud Subscription
  • How To Change or Reinstall a Computer
  • How To Join, Restart or Logout an Existing MyQuickCloud Session
  • How to Restart Your Computer or Server Remotely
  • How to Enable Multi-Factor Authentication In MyQuickCloud
  • How to Add a New Computer
  • How To Transfer Files In The MyQuickCloud WebApp
  • How To Print With MyQuickCloud
  • Types of Access to Your Computers – MyQuickCloud
  • Connect to MyQuickCloud Using an Android Device
  • How to Change The MyQuickCloud Desktop Application Settings
  • How To Delete A User and Remove From Subscription
  • How To Reset Your Password in MyQuickCloud
  • How To Share Files and Folders – MyQuickCloud
  • Connect to MyQuickCloud Using an iOS Device
  • Copy Files from Mac to Remote Computer
  • How To Use Spaces in MyQuickCloud
  • How To Setup Your Subscription With MyQuickCloud
  • Add Users To Your MyQuickCloud Account
  • How To View And Download Statements
  • How To Re-activate a MyQuickCloud Account

Videos / Webinars

3
  • What’s the difference between on-premise and managed cloud
  • Getting Started with MyQuickCloud
  • What is MyQuickCloud?

QuickBooks

8
  • How to Setup the QuickBooks Database Manager
  • Update QuickBooks Payroll on a Managed Cloud Server
  • QuickBooks Requires Reboot to Complete Installation
  • QuickBooks Cannot Communicate With The Company File
  • QuickBooks Company File Is Not Updating
  • QuickBooks No Company Open Issue
  • QuickBooks is Unable to Print
  • QuickBooks Freeze When Exporting Reports
  • Home
  • Support
  • Knowledge Base
  • How To
  • How to Enable Multi-Factor Authentication In MyQuickCloud

How to Enable Multi-Factor Authentication In MyQuickCloud

This guide will show you the steps on how to enable multi-factor authentication in MyQuickCloud and give a brief overview on how it works.

How to Enable #

Multi-Factor Authentication provides an extra optional layer of security when logging into MyQuickCloud. To enable it on your account please do the following:-

  • Log into your account online https://myquickcloud.com/login/ and click Lets Connect
  • Click the Account icon and then on the next screen click the Details icon
  • Next to Multi-Factor Authentication click the Enable button

Account Information menu screen with the toggle button to enable MFA

Multi-Factor Authentication is now enabled for all users on your Account. To disable you can follow the same steps but click the disable button, this will then remove the multi-factor authentication from this account.

How it Works #

Now you have enabled Multi-Factor Authentication each time any users on your account login they will receive an email containing a unique code to enter into MyQuickCloud after they have entered their normal username and password as below

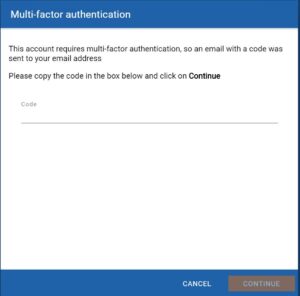
Once the code has been entered you will be logged in as normal

Updated on June 7, 2022
How to Add a New Computer
Table of Contents
  • How to Enable
  • How it Works
MyQuickCloud Logo
Empower remote workers

Make anywhere your office

  • Terms and Conditions
  • Cookies policy
  • Privacy policy
App Store Google Play

About

  • About Us
  • Support
  • Press
  • Blog
  • Contact us

Product

  • Features
  • How it works
  • Downloads
  • Partners

Support

  • Support Center
  • Knowledgebase
  • Documentation
  • How To

Copyright © 2023 Vedivi Limited.

Vedivi Limited, First floor, 85 Great Portland street, London W1W 7LT. Registered in England No 4162220

MyQuickCloud is not associated with, or sponsored by Intuit or Microsoft