How to Change MyQuickCloud Settings #
This guide will show you how to change the settings in the MyQuickCloud Desktop Application. There are several customization options available, allowing you to tailor MyQuickCloud to your specific needs.
Note
Some settings may not be available on the website version of MyQuickCloud due to browser restrictions.
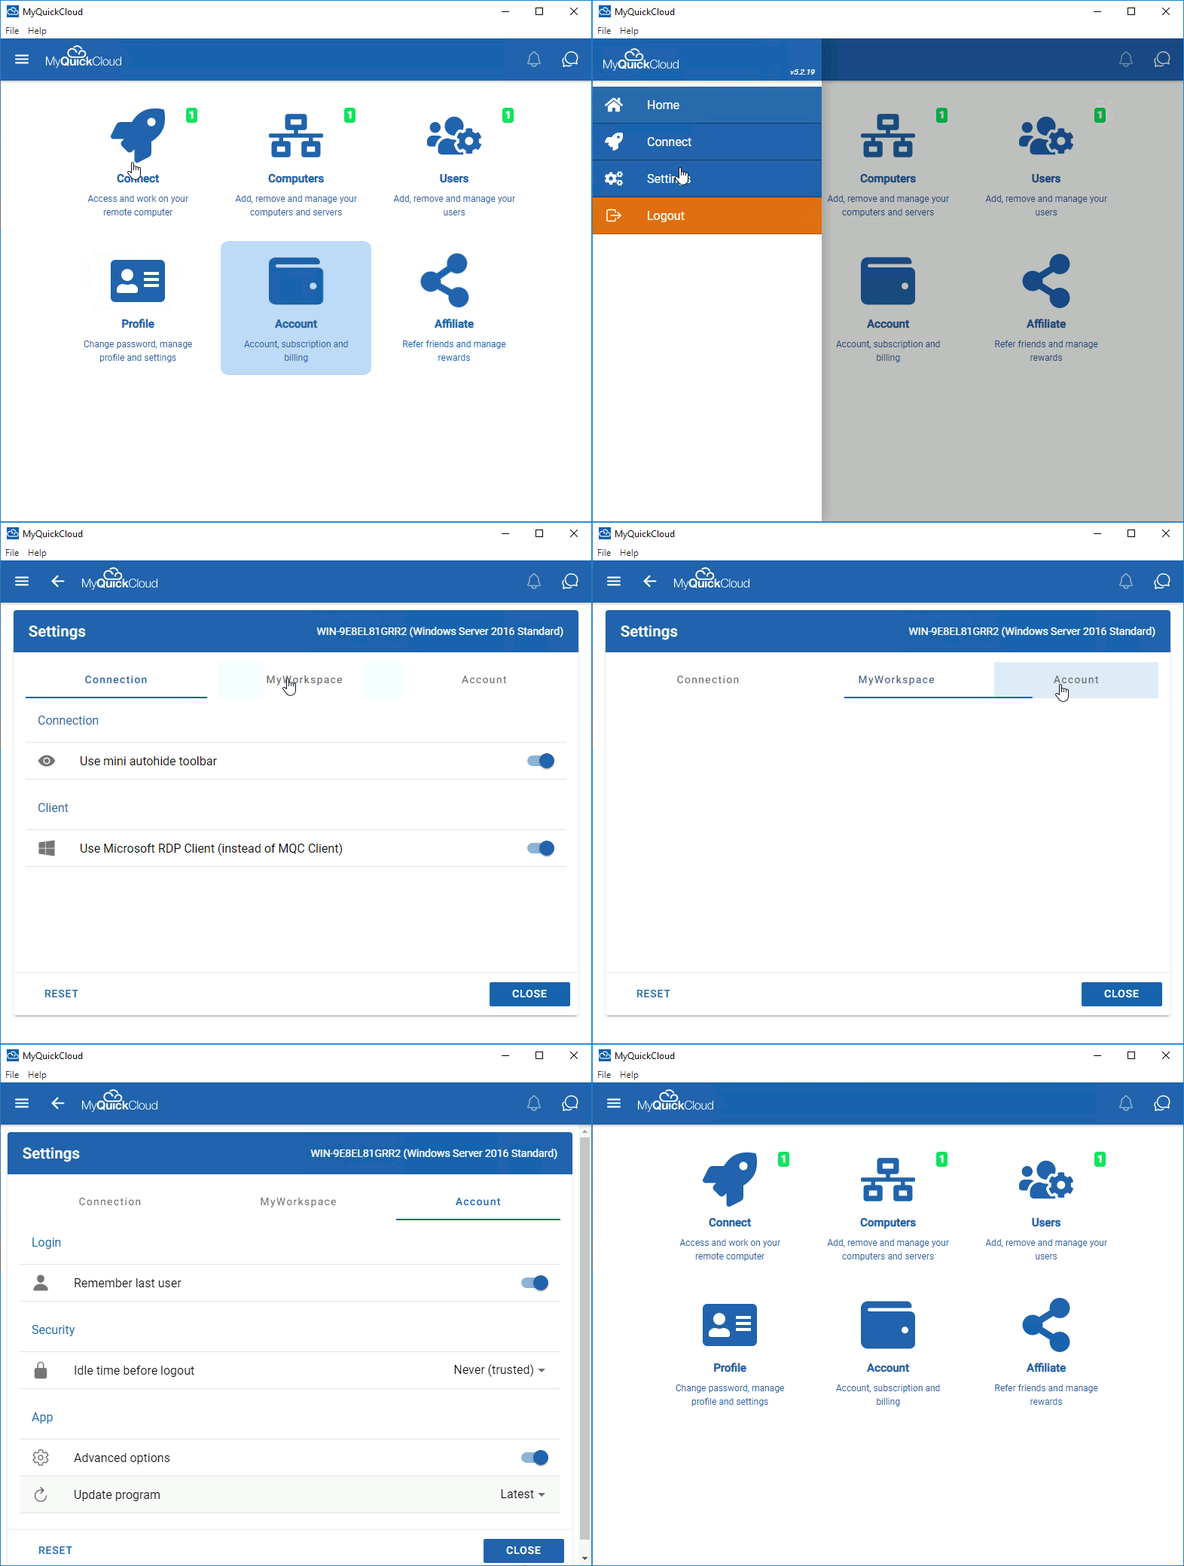
To access the Settings page, click the menu (≡) button, then select Settings.

Connection #
Use Microsoft RDP Client (instead of MQC Client)
- Recommended by default on the Desktop App only. This option utilizes the Microsoft Remote Desktop Protocol (RDP) for connections.
- If you experience connectivity issues with Microsoft RDP, you can disable this setting to use the same connection method as the MyQuickCloud Web App.
MyWorkspace #
Display #
Choose the right size for your remote desktop
- Allows you to set a specific screen resolution for your remote session.
- The default setting is full screen.
Use all my monitors for the remote session
- Disabled by default.
- Enabling this setting will allow MyQuickCloud to utilize all available monitors instead of just one when connecting to a remote session.
Local devices and resources #
Clipboard
- Enabling this setting allows copy-pasting between your local device and the host computer.
Drives (only usable on Windows PCs, using the MyQuickCloud Desktop app)
- Enabling this setting allows you to see your local device’s disk drives in File Explorer while connected to the host.
Note
These drives are only visible to you and are not attached to the host computer.
Other P&P devices (only usable on Windows PCs, using the MyQuickCloud Desktop app)
- Similar to the Drives setting, enabling this option allows you to access USB drives and other P&P devices from your local PC while connected remotely.
Printers
- Allows redirected printers to be available on the host computer.
Note
Redirected printers require the local printer driver to be installed on the host computer. For ease of use, we recommend using the MyQuickCloud Printer.
Keyboard #
Apply Windows key combinations
Determines how Windows key combinations (e.g., Windows Key + E) behave during remote sessions.
- Only when using full screen – Windows key combinations affect the host computer only if the remote session is in full screen.
- On this computer – Windows key combinations only affect the local computer.
- On the remote computer – Windows key combinations always affect the host computer.
Audio #
Controls audio settings for both playback and recording.
Playback
- Do not play – No sound from MyQuickCloud sessions are played in the remote session or on the local computer.
- Play on this computer – Sounds from the remote session play on your local computer.
- Play on remote computer – Sounds from the remote session play on the host computer.
Recording
- Do not record – Prevents any recording attempts.
- Record from this computer – Allows recording using a microphone or other recording device from your local computer.
Account #
Login
- Stores the email address of the last logged-in account for quicker sign-in.
- Can be disabled for security or to facilitate quick user switching (prevents the email from being auto-filled).
Security #
Idle Time Before Logout
- Default: Never
- Adjusts the time before the MyQuickCloud dashboard logs out. This does not affect active remote sessions.
App #
Advanced Options
- Enables or disables advanced settings within the menu.
Update Program
- Controls access to MyQuickCloud updates.
- By default, the latest fully tested version is used.
- You can opt into Alpha or Beta versions for early access to upcoming features.
Customizing MyQuickCloud settings allows you to optimize your remote desktop experience. If you encounter any issues, feel free to refer to the Support Center or contact support for assistance.


