In this article, we will cover the following:
- Creating a new user
- Deleting a existing user
- Updating a user’s information
- Managing a user’s access to computers and servers
Creating a new user
Billing
Before creating a new user, please check that you have enough users on your subscription. To increase the number of users on your subscription, follow the steps here: https://myquickcloud.com/knowledgebase/how-to-add-users-to-your-myquickcloud-subscription/
Overview #

Detailed steps #
- Log in to your MyQuickCloud account as an admin user – https://myquickcloud.com/login/
- Click on Users
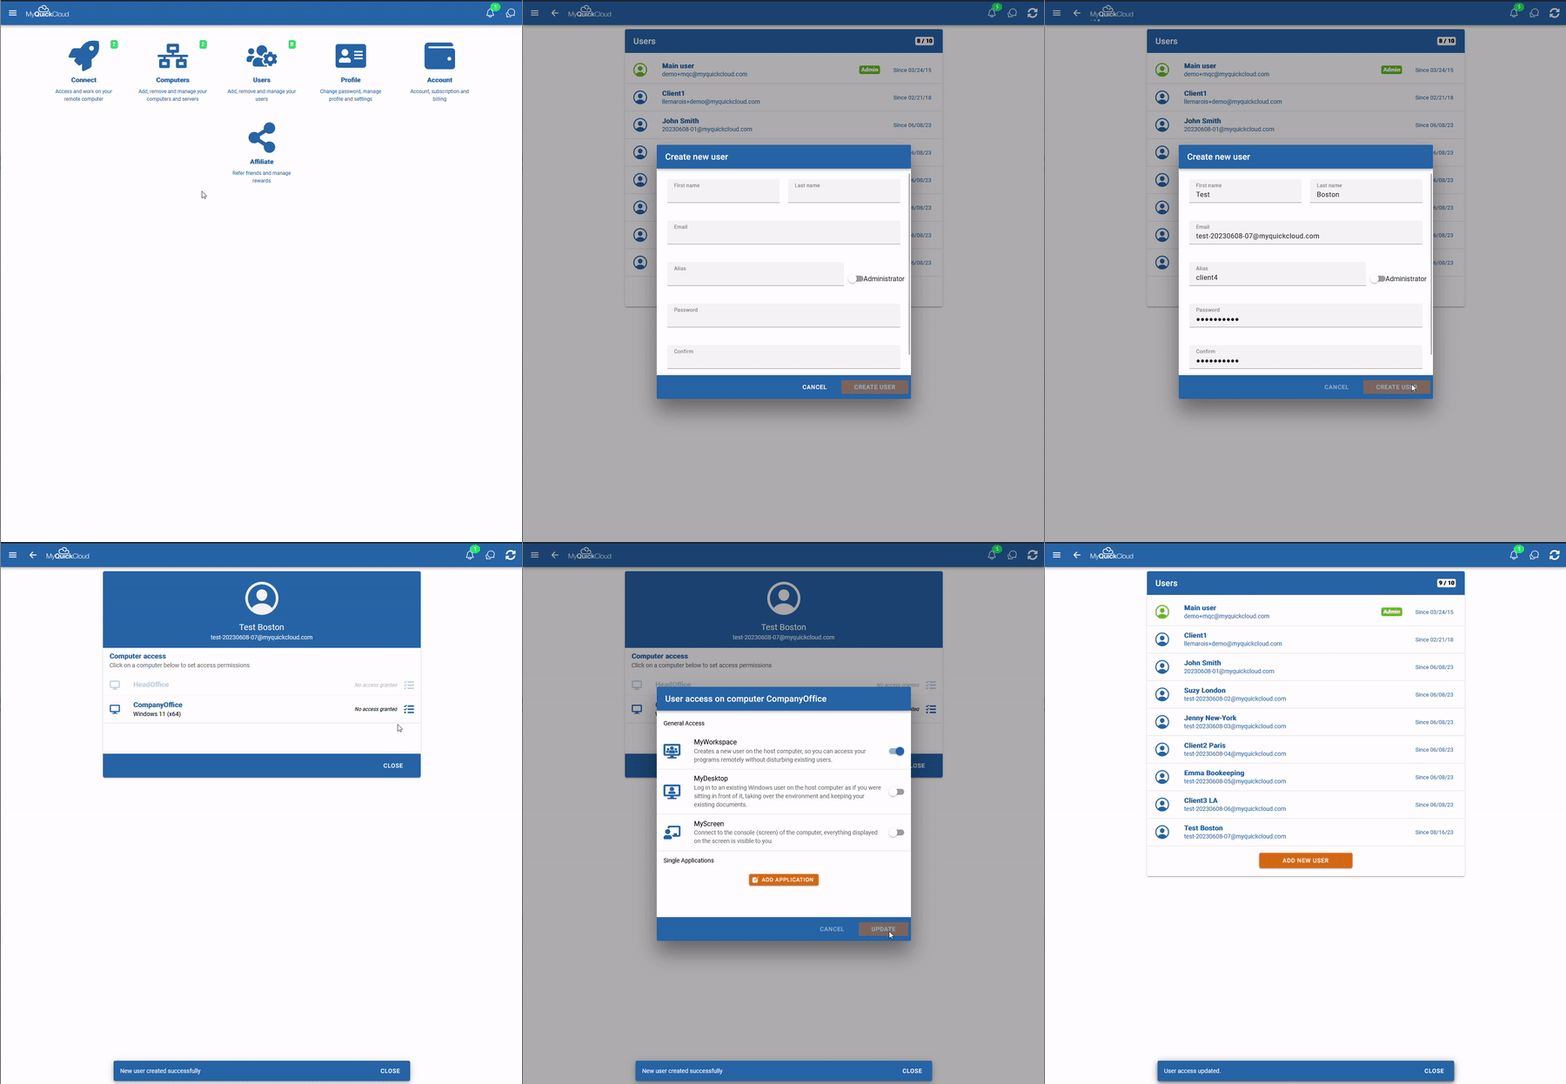
- Click on ADD NEW USER
- Enter the new user’s details
- Alias: this is a friendly name for that user. It must be unique in your account and be between 3 and 9 characters
- Administrator: only select this option if the new user will also be an administrator on your account. Administrators can view/manage access, users, billing…
- Password: the password needs to meet the following complexity rules
- At least 8 characters long (longer is more secure)
- At least 1 upper case character
- At least 1 lower case character
- At least 1 number/digit
- It cannot be a combination of the user’s email or alias
- Once done, click CREATE USER to create the user
- The user is now created but doesn’t yet have access to your server. If you do not want to give them access, you can click on CLOSE – otherwise, follow the steps below
- To give that user access to your server, click on
 next to the corresponding computer
 - Toggle the button next to MyWorkSpace and click on UPDATE (for more information about the different ways users can connect to your server see How To – Publish an App)
- Click on UPDATE to save the changes
The user has now been created and will be notified by email – please let them know the password you chose for them and ask them to change it for added security.
Deleting an existing user
Billing
Deleting a user does not change your billing. If you want to delete the user and stop being charged for that user, do the following:
- Delete the user by following the steps below
- Decrease the number of users on your subscription by following the steps here https://myquickcloud.com/knowledgebase/how-to-remove-a-user-from-your-subscription/
Note: If the user is an administrator on your MyQuickCloud account, you first need to edit the user information and uncheck the admin option (see Edit user info) – you can then proceed to delete that user as per the steps below.
Overview #

Detailed steps #
- Log in to your MyQuickCloud account as an admin user – https://myquickcloud.com/login/
- Click on Users
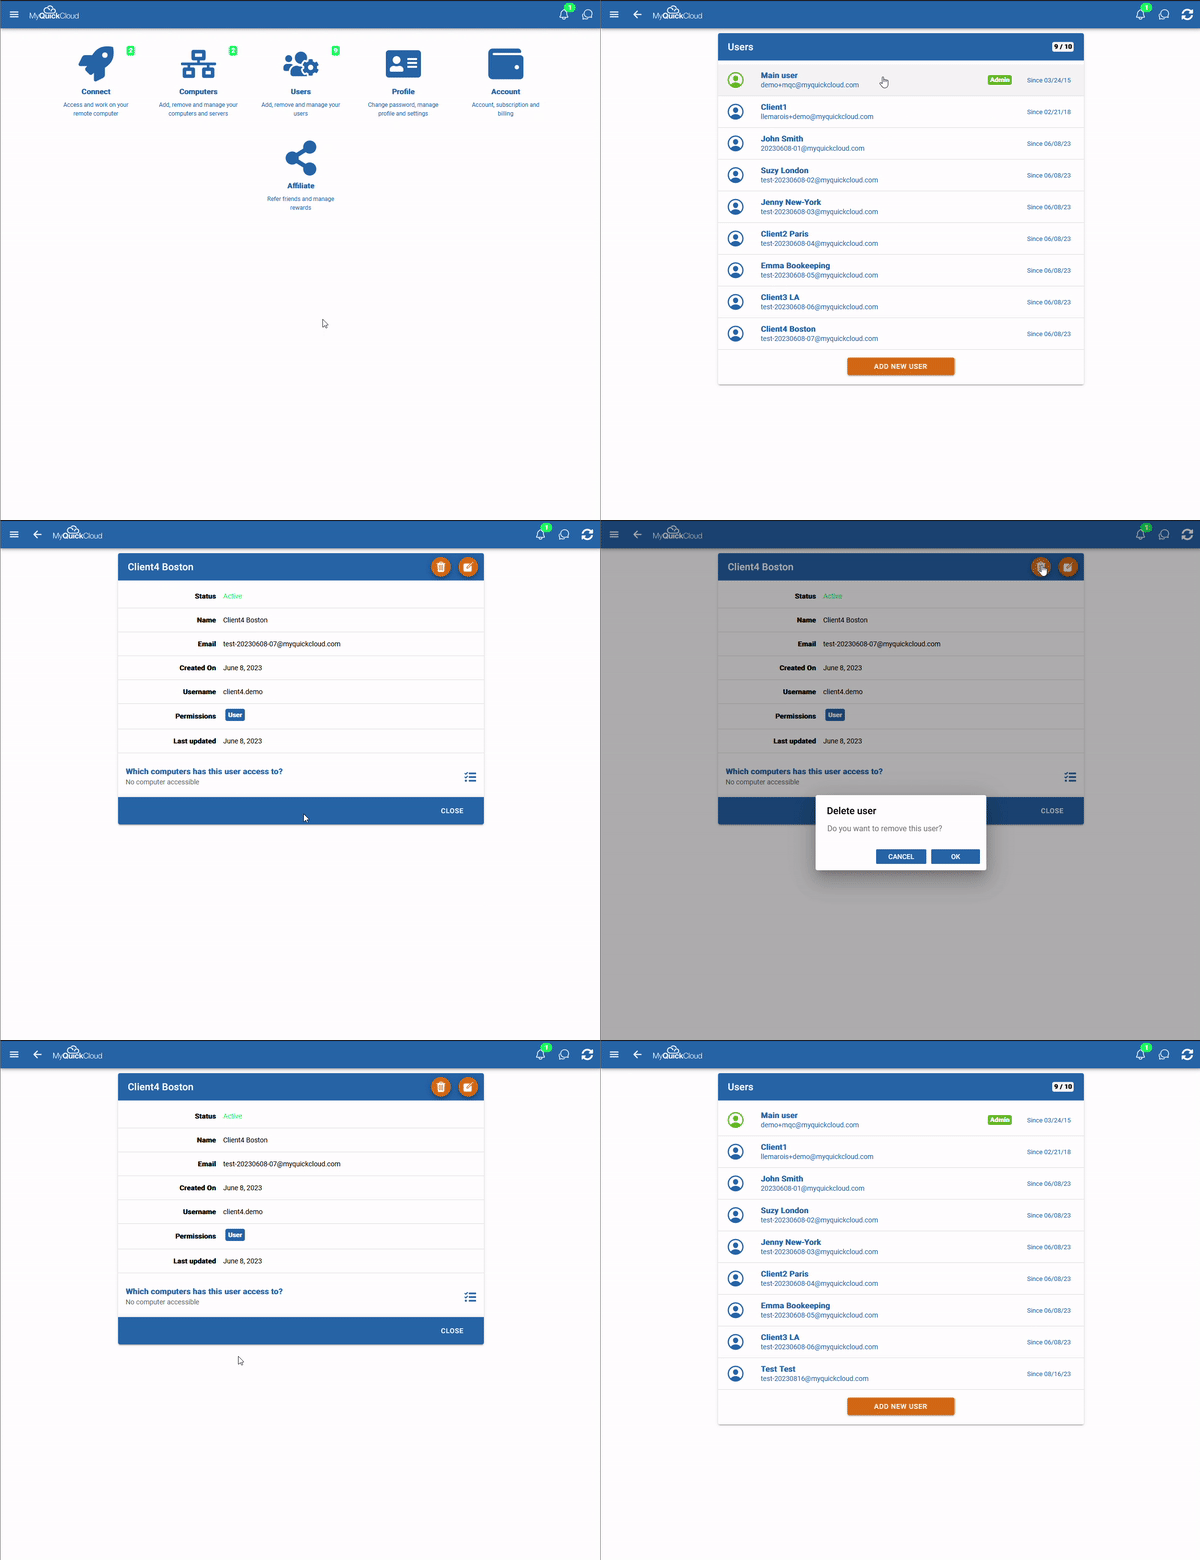
- Click on the user you want to remove
- Click on the bin icon
 , on the top right
 - Click OK to confirm
The user has now been removed and will no longer have access to MyQuickCloud or to your server.
Managing Users
In this section, we will explain how to update a user’s information as well as their access to your server.
Edit user info #
As an administrator on the account, you can change the following:
- First and Last names
- Switch between normal user or administrator
Overview #

Detailed steps #
- Log in to your MyQuickCloud account as an admin user – https://myquickcloud.com/login/
- Click on Users
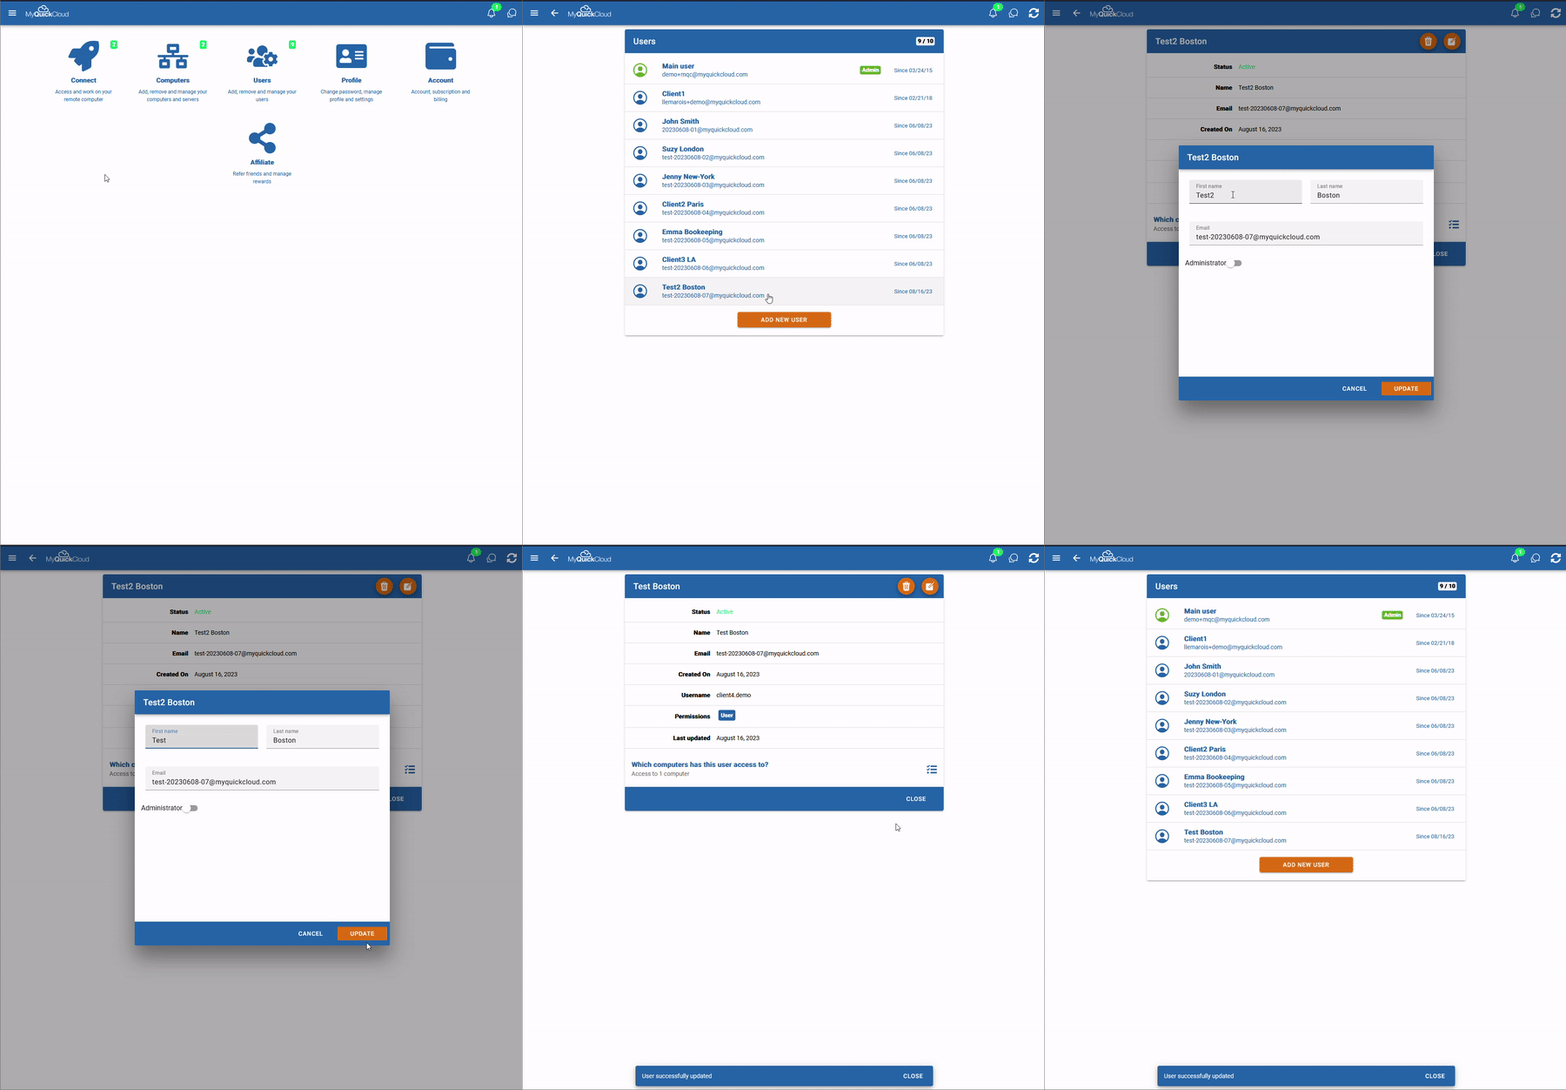
- Click on the user you want to edit
- Click on the edit icon
 , on the top right
 - Update their details or toggle the Administrator button as needed
- Click Update
Change user access #
As an administrator on the account, you can change how users access your servers. For example, you can grant or revoke access to a server.
Overview #

Detailed steps #
- Log in to your MyQuickCloud account as an admin user – https://myquickcloud.com/login/
- Click on Users
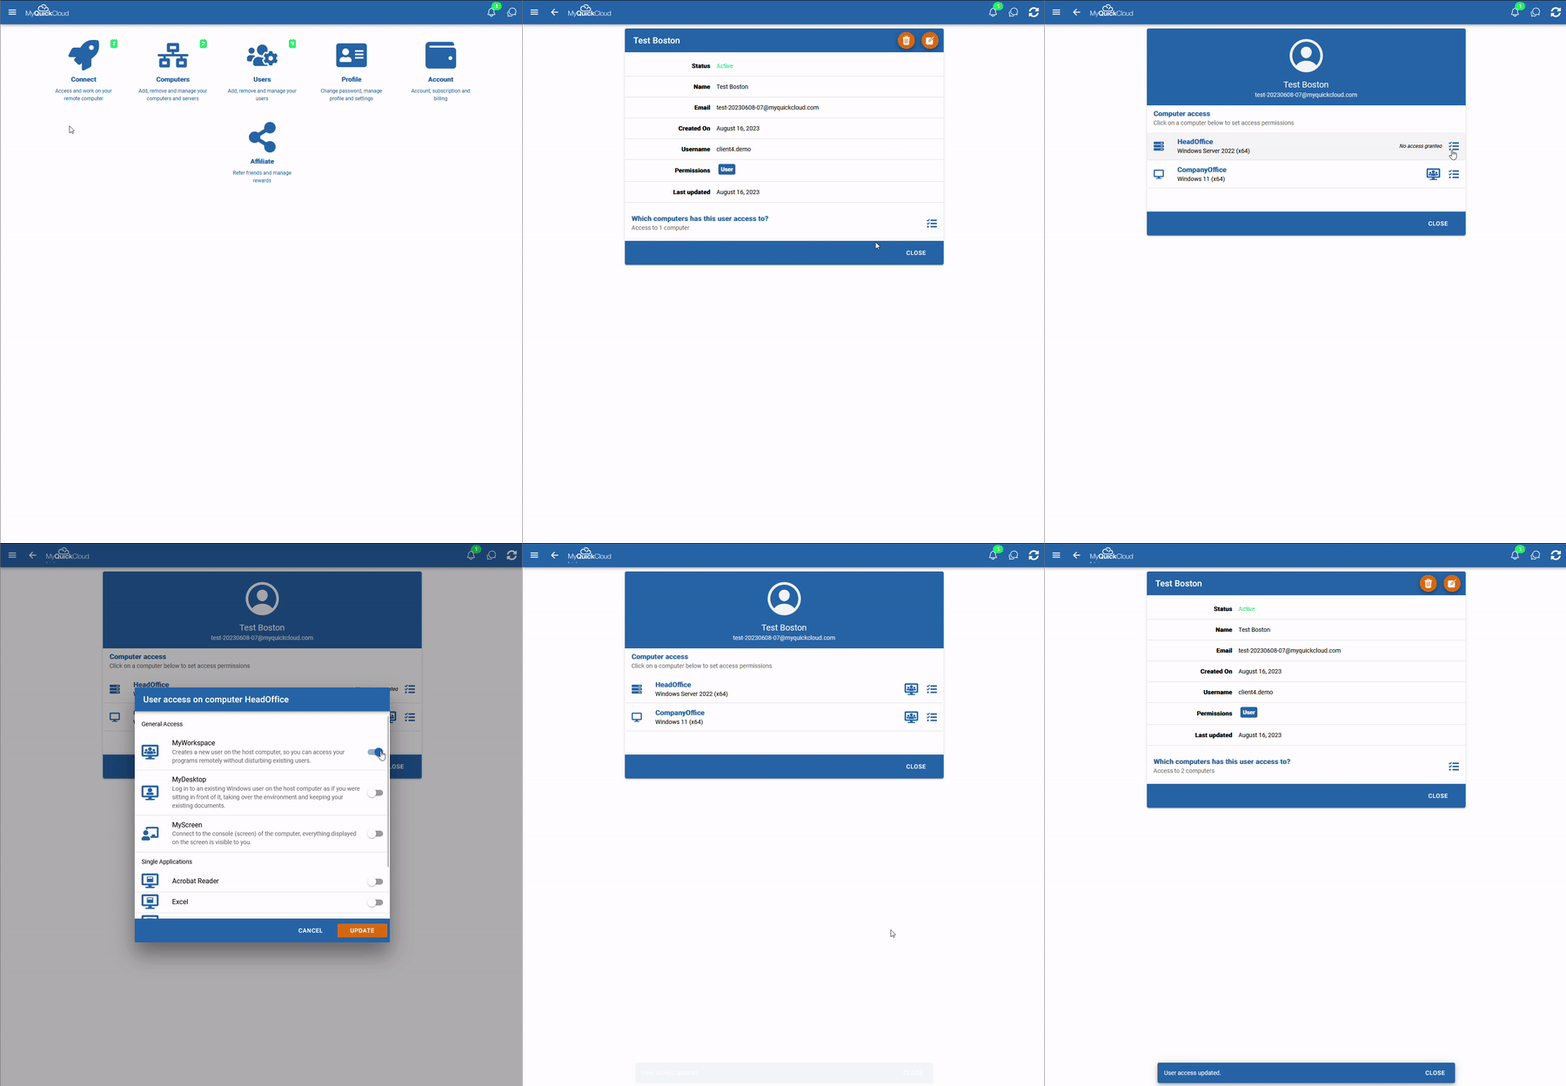
- Click on the user you want to edit
- Click on the edit access icon
 , next to Which computers has this user access to?
 - Click on the edit access icon
 , next to the corresponding computer
 - Tick or untick the access as needed
- Click on UPDATE


