This article relates to an older version of MyQuickCloud and is no longer valid. Please go to our How-To section to view the latest articles here – https://myquickcloud.com/kb/how-to/
The Host is the computer with the programs on it that you want to access remotely. The MyQuickCloud administrator (admin user) can add Host computers to your cloud.
Adding a Host Using the MyQuickCloud Desktop App #
Click here for Web App instructions.
Step 1
Download MyQuickCloud from the MyQuickCloud Downloads page:
https://myquickcloud.com/downloads/
Step 2
Run the download to install MyQuickCloud, and after the first use configuration, sign into MyQuickCloud using admin credentials.

Step 3
Click on the Manage tab on the left to open up the admin options.
![]()
Then select the Hosts tab option.
![]()
On the host tab, click on Add this computer button
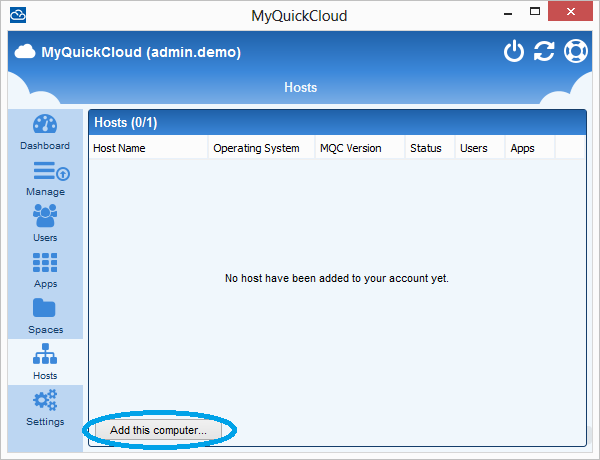
Step 4
Click Next in the wizard and the computer will be set up as a host (might take a minute or two).
Please Note: To setup a host you will need Administrator privileges on the host computer.
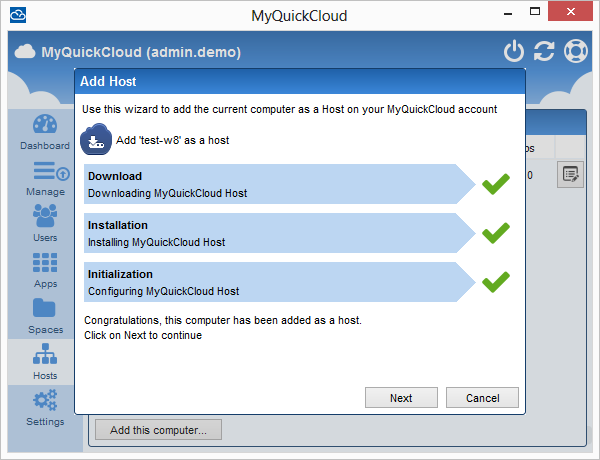
Now that the computer is added as a host, you can start publishing applications from MyQuickCloud.
Please Note: Configuration of the newly added host can be done from any MyQuickCloud (you don’t have to be on the host computer to publish apps).
Adding a Host Using the MyQuickCloud Web App #
Step 1
Log in to your MyQuickCloud account as an admin user here: https://myquickcloud.com/login/
Step 2
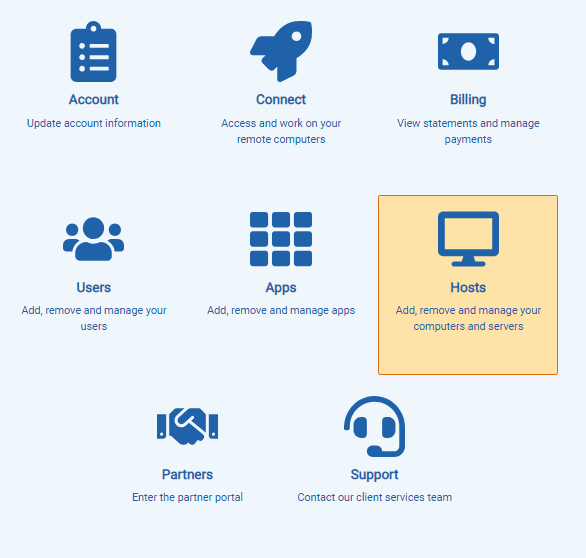
Select the Hosts icon from the dashboard.
Step 3 #
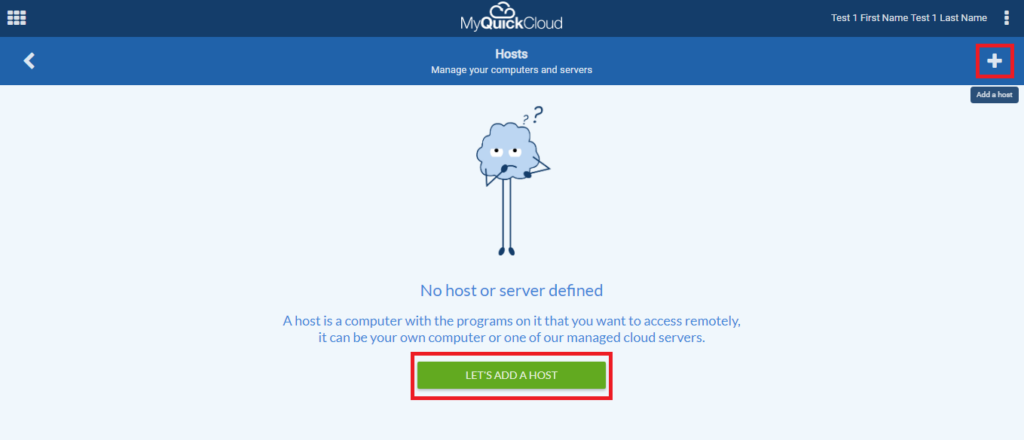
If you don’t have any computers setup as a host already you should see this screen below. Click the Let’s Add a Host button to continue.
If you already have a host computers setup, you should see them listed here. Simply click the + icon (Add a host) to add the new host.
Step 4 #
Select Setup Now under Access this computer remotely, to add the computer you’re on now as a host. This will start the server download and installation process.
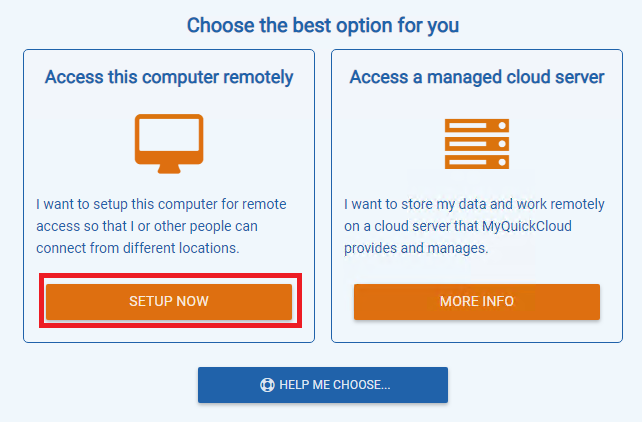
Step 4
The MyQuickCloud Host installer will begin downloading automatically, when the download is complete, open the installer to continue the setup.
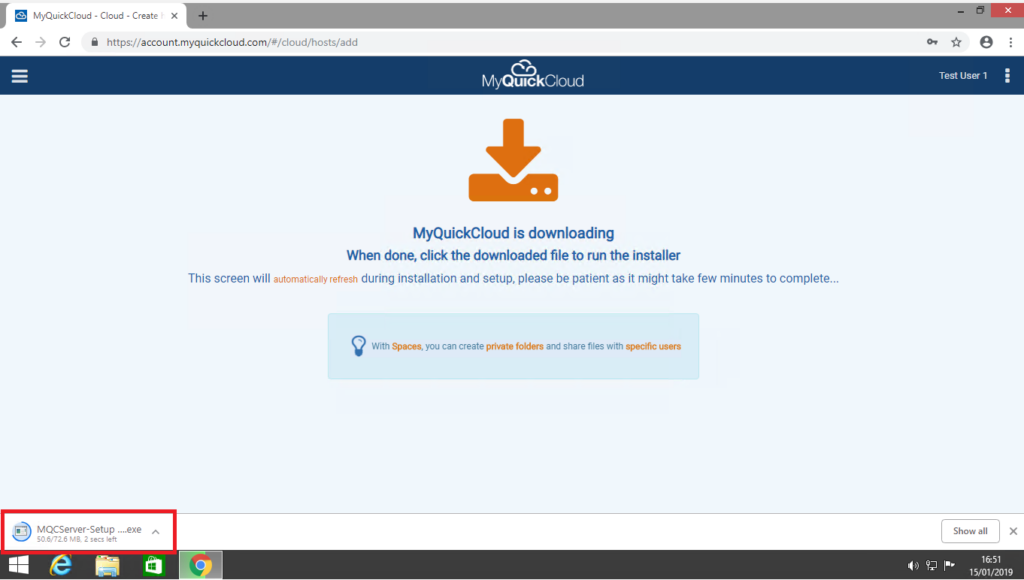
Note: the example above is a screenshot of Google Chrome, your browser may look different. If you’re having trouble finding the download, Ctrl+J is a common shortcut to show your download history in most browsers.
Step 5
Once you’ve run the MQC Server setup, it will begin automatically installing the Host software required.
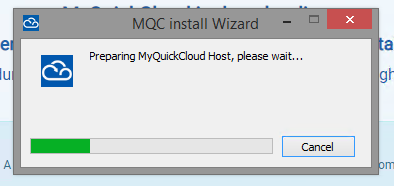
You may be prompted by Windows to allow the installation to continue, click Yes to carry on with the setup.
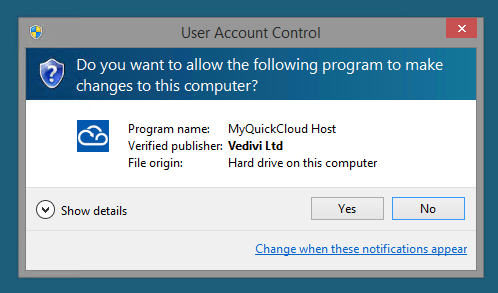
Step 6
When the Installation has completed successfully you should see this screen on your MQC account:
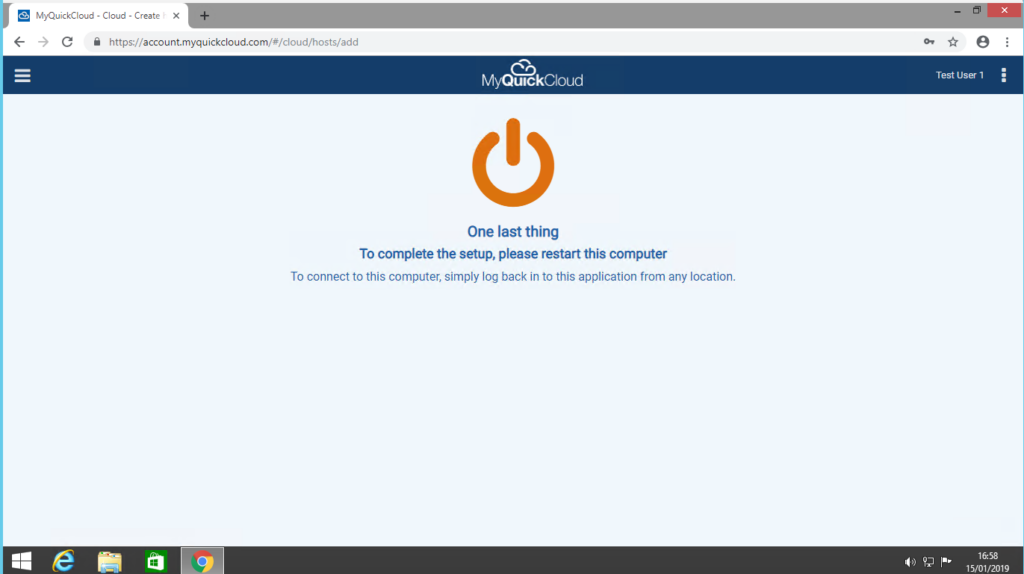
Restart your computer to finish the installation process.
Step 7
After your computer has restarted, log back in to your MyQuickCloud account as an admin user here: https://myquickcloud.com/login/
Now that the computer is added as a host, you can start publishing applications from MyQuickCloud.
Please Note: Configuration of the newly added host can be done from any MyQuickCloud (you don’t have to be on the host computer to publish apps).
Still Stuck? #
You can go through the steps to manually add the host or you can contact us and our techs can remote on and investigate.


